Pages

My philosophy....homemade is ALWAYS healthier, is ALWAYS cheaper, and is therefore BETTER!

When you make things homemade you will naturally never put in as much sugar or salt as the companies do-you just won't. Plus homemade means no preservatives and you know the common rule-your food should be able to go bad or its not real food!

When you make things homemade you're always saving money! Who wants to pay the manufacturer, shipper, store, etc. each for a box of cookies!?!?!

Once you go homemade-you'll never go back! Fresh food that YOU produced for your family will not only leave you feeling accomplished and proud, it tastes incredible and you'll never be able to eat the packaged stuff without comparing-and homemade will win!

Have fun, experiment, and Enjoy!

Friday, November 16, 2012

Can never have enough Butta!

Who doesn't love butter!?!  Guess what?!?  Its incredibly easy and the fresh taste is oh so good!  

With Thanksgiving coming up making butter is a fun and easy project for you and your kids to do to show how the people during the first thanksgiving may have enjoyed such a treat. 

What you'll need:
heavy whipping cream -at least 1/2 cup
pinch of salt (optional)
mason jar
little marbles or rocks


Put everything in your jar.  Put the lid on and start shaking!!  Turn on music, give your kids a jar, and let them work out their energy-while creating some extra tasty goodness for you!  After about 10 minutes your liquid cream will all the sudden become a solid and you'll hear it "thud" in the jar!  And, bonus...the extra liquid is buttermilk!  Who knew!  Drain the buttermilk and save for Buttermilk Biscuits??  Store in you jar, in a tupperware container, or make your own sticks by measuring 1/2 into folded parchment paper and put in the fridge to cool. 

Too Easy!

Info: Unsalted butter has a shelf-life in the refrigerator of up to 3 months
          Salted butter can last up to 5 months in the refrigerator because the salt acts as a preservative


Be Creative and Enjoy!


STATS-
Better: This butter is creamy, delicious, and actually tastes like cream-  Not plastic! *check*
Healthier: I'm sure you've all heard the stats about butter vs margarine. My biggest issue-Margarine is just not natural!  Its made by adding hydrogen to vegetable oil.  Mmmmm.....gross!  *check*
Cheaper: A quart of heavy whipping cream at Walmart is $2.98.  1 quart of whipping cream will make about 4 cups/2 lbs of butter (plus buttermilk).  2lbs of Kirkland brand butter at Costco is $5.25!  *check*

Sunday, November 11, 2012

Homemade Yogurt


So there I was a few months ago just enjoying a wonderful girl time conversation with my friends where I complain about the combination of how expensive things are and the horse-like appetite of my 2 year old.  This particular day I had just spent some sort of ridiculous amount of time finding, cutting, and matching coupons to purchase the little individual junk filled yogurt cups for $.56 a cup instead of $.66 a cup.  wahoo-big saver.   When I heard magical words spoken to me, "you know you can make your own yogurt?"  What?!?!  It had NEVER occurred to me!  Like ever!  So I've spent the last few months trying and trying again until I was sure my method (with MUCH advice and collaboration from my dear wonderful friend Lauren) is one that you can do and always end up with yogurt in the end.

With no further adieu I give you:  YOGURT!

 What do you need?  Milk and starter yogurt (store bought plain yogurt with live active cultures)

 You start with milk.  I use 2 percent because thats what my kids drink and I've tried whole but didn't see any difference in the yogurt so use what you have.

Pour 1/2 gallon milk into a large pot and heat on the lower end of med-hi
 --------I do these next steps while i'm making my kids food or cleaning my kitchen because you want to stick around to check on your yogurt as it processes.

You need to heat the milk slowly until its almost boiling but NOT boiling.  You do not want to burn the milk!   You're waiting until a skin develops on top and then you've hit the right temperature

Take the pot off the heat to let cool.  You need to let it cool until you can hold your finger in it and count to 10 without screaming.  Seriously -that's how I measure :) -this takes around 30 min or so

At this point you need to stir in your starter yogurt.  I use at least 1/2 cup yogurt for ever 1/2 gallon of milk.  Be sure your yogurt is plain and has live active cultures.  The milk has to be warm enough to let the cultures grow but not too hot that it'll kill them.  You need to start with store bought yogurt but then each time you make it you can save some of your previous batch as your next starter.

Turn your oven on and let it heat for 2 min and then turn it off

Put a lid on your pot and wrap it up on a couple towel with love


Put in your oven and leave it for at least 7 hours.  The longer you let it sit the more sour so if you like sour yogurt let it go-even 24 hours!


When your time is up take your pot out and behold....Yogurt!  The clearish greenish liquid on top is the whey.

You can stir the whey back in for regular yogurt that is a runnier yogurt.  You can also strain the whey out to make Greek Yogurt.  Greek yogurt is a thicker yogurt that is growing in popularity because of its health factors.  Whey holds the lactose and so Greek yogurt (without the whey) has far less carbs then regular yogurt and more protein per serving than regular yogurt.  For more info you can go here.

To strain out the whey, spoon the yogurt into cheesecloth and let it drain. 

Add jam, vanilla, or honey to sweeten.

Store in mason jars or Tupperware in your fridge.

Be creative and enjoy!


Delicious with Strawberry-Banana Granola


STATS:
Better: This stuff is so good! Its the real deal!  *check*
Healthier: Did you know that Yoplait's Go-Gurt has MORE sugar than Coca-Cola!?!?!?! Homemade yogurt allows you to control the sugar and make it tasty but keep it healthy!  *check*
Cheaper:  Yes I know $.56 per container is a total STEAL but....1/2 gallon milk will make 2 pints greek yogurt which is around $5 depending on the brand and you just made it for about $1.75! *check*


Strawberry-Banana Granola


As I walk down the isles of the grocery store I am again brought to my knees by shock and horror when I notice the seemingly miles and miles of colorful cardboard boxes full of sugar covered press-board; that is supposed to fill the belly of our young ones and provide them with enough nourishment and energy to sustain them through their arduous morning.  Not going to happen!  But alas!  There is a tiny bag...way up high...full of something that looks healthy....full of fiber and oats....and it's delicious!  It is...Granola!  Yum.  One problem-that tiny bag is $6!  There's not enough in that thing to last my 2, 4, and 5 year old for 1 meal!  And so I give you... this: 

Strawberry-Banana Granola (to be said in a loud deep manly voice that echos)

There are many many many granola recipes you can find online and I love lots of them.  This one is just my families new favorite!  I found it here

Strawberry-Banana Granola
1 or 2 bananas
1 cup strawberries
1/3 cup brown sugar
1/3 cup honey
¼ cup canola oil
¼ cup water
½ teaspoon cinnamon (optional)
several gratings of nutmeg (optional)
10 cups rolled oats
½ cup wheat bran
½  cup flax seed
1 cup walnuts, roughly chopped (I chop my walnuts up pretty small so my little ones don't notice them)
1 cup almonds, sliced, slivered, or roughly chopped
1-1/2 cup dried cherries or cranberries

Combine the bananas, strawberries, sugar, honey, oil, water, cinnamon and nutmeg in a blender and blend till thoroughly pureed.


Combine the remaining ingredients except for the dried fruit and mix with your hands till the ingredients are evenly distributed. Pour the fruit sauce over the oat mixture and stir till it’s all evenly mixed.  Bake for 45-60 minutes at 300 F., stirring every 15 minutes or so.

When the mixture has cooled, add the dried fruit and store in an airtight container.   Yield: Plenty! Can be halved.

 I know....that sounds soooo good right?!  We eat it with homemade yogurt and fresh strawberries and bananas in parfait form or just with milk as cereal.  

Be creative and Enjoy! 


SOOO good with  Homemade Yogurt 

Stats:
Better?  Ok that expensive store bought stuff is good....but this is soooo good! *check*
Healthier?  Sorry folks, even the all natural stuff has preservatives...it's gotta last the test of the time shopper.  *check*

Cheaper?  Even if you were to buy everything on this list just for this recipe it'd probably cost you what-$10?  And it makes a good 10 cups!  The expensive stuff is at least $6 for less than 3 cups!  Seriously!  *check*

Saturday, October 20, 2012

Garlic Cheese Pumpkin Dip

Don't worry the pumpkin is only for display.  I look forward every year to Halloween so I can have this yummy cheese dip at my aunts house.  I asked her for the recipe so I could make it for my sister-in-laws baby shower and it was as big of a hit there as it is in my belly each Halloween.  And surprisingly easy!


Cut the top off a small pumpkin and scrape the seeds out. (don't forget people will be eating the dip out of here so cut the top a lower than you would just for carving)

In a bowl mix:
1 package softened cream cheese
1 container garlic and herb allouette cheese
1/8t pepper
2 eggs

Pour cheese mixture into your hallowed out pumpkin.  Place pumpkin and lid on a cookie sheet and bake for 1 1/2 hours at 225 degrees.  The cheese will bubble up and brown on top.

Serve with crackers!  This is sure to be a favorite go to recipe for a fun and delicious appetizer for fall.  


Be Creative and Enjoy!

Thursday, October 18, 2012

Wheat Crackers

It's 9:30, the kids are finally in bed asleep, and you're favorite show is DVR'd and ready for your enjoyment but....You're Starving!  One of my favorite snacks that is healthy and filling is a classic cheese, cracker, and fruit plate.  Yum!  I love these healthy, simple, robust wheat cracker for such occasion!  There's endless possibilities of toppings and mix-ins to make your crackers satisfy your craving!

1c white flour
1c wheat flour
1t baking powder
1/2t salt
2/3c warm water
1/3c olive oil


Preheat oven to 400 degrees and lightly grease two large cookie sheets.  Combine the dry ingredients, and then stir in the water, oil and mix until smooth dough forms. 


Divide the dough in half and flatten each half on a cookie sheet.  Use a small rolling pin, a smooth cup, or even your fingers for a rustic look. 

Once dough is spread thin, use a pizza cutter to cut the dough into squares.  The elasticity in the dough will make the crackers shrink slightly and pull away form each other;  so easy!

Brush lightly with an egg wash (1 egg white and 2T water) or spray lightly with olive oil. 

Sprinkle with sea salt of other desired seasonings. 

Bake at 400 degrees for 10-12 min until crackers are golden and crispy.


IDEAS:  Rosemary and sea salt, sesame seeds, Parmesan cheese, chopped sun dried tomatoes

STATS:  
Better? These are delicious and so versatile!  They've got a good crunch and can hold up to dips. *check*
Healthier? No preservatives, no sugar, made to order! *check*
 Cheaper? One batch makes more than one box of Wheat Thins and costs pennies vs avg $4 for an 8oz box!  *check*

Wednesday, October 10, 2012

Homemade Chicken Noodle Soup

We all know there's nothing like a big bowl of warm chicken noodle soup!  Soothing for the body and soul!  This is my grandma's recipe and it's amazing! 


Place a whole chicken in a pot and cover with water and boil away!  tip*when you buy whole chickens be sure they're over 5lbs to make sure you're getting a good deal on the meat and that you're paying for too much bone.


DON'T DUMP OUT YOUR STOCK...this is your broth!

After it's all cooked take your chicken out and when it's cooled, shred it. 

You'll probably need to add more water to your broth as much of it boils out when cooking the chicken.  To your broth add: 4 sliced carrots, 4 sliced celery stocks, and a chopped medium onion, and your shredded chicken.  Let simmer as long as you'd like but at least 30 min.

Noodles:
Beat 2 eggs, and 2T milk, and 1T salt together.  (Your noodles will be very salty but this will help to salt your broth as they boil)  Add enough sifted flour to make the dough thick-start with 1c and slowly continue to add.  Roll out the dough and cut in 1/4" strips-I use a pizza cutter.

my kids love helping with this part!
These noodles can be dried and saved!  


About an hour before serving bring your broth to a full boil to add your noodles.  You need to add your noodles one at a time so they don't stick together.

Let your soup boil until your noodles are plump and soft.  Be sure to taste your broth now to see if you need to add more salt.  Depending on how much extra water you had to add you will probably need add more salt.


Serve with French Bread!


Be creative and Enjoy!

Easy French Bread

We can put down a lot of bread!  Ok-truth...I can put down my own fair share of bread-especially this french bread!  This is one of my all time favorite recipes!  Sooooo good and my favorite-so easy!

1 pkg quick acting yeast (or 2 1/2t  if you buy in bulk like I do)
2c warm water
4c sifted flour
1T sugar
2t salt

Dissolve yeast in 1 c water.  Add flour, sugar, and salt together in a large bowl, then stir in the dissolved yeast.  Add just enough of the second cup of water to hold dough together.  Mix until soft and rather sticky.  Cover and set bowl in a warm spot- I like to fill the bottom of my sink with warm water and put the bowl in that to rise.  Let rise until double in size.

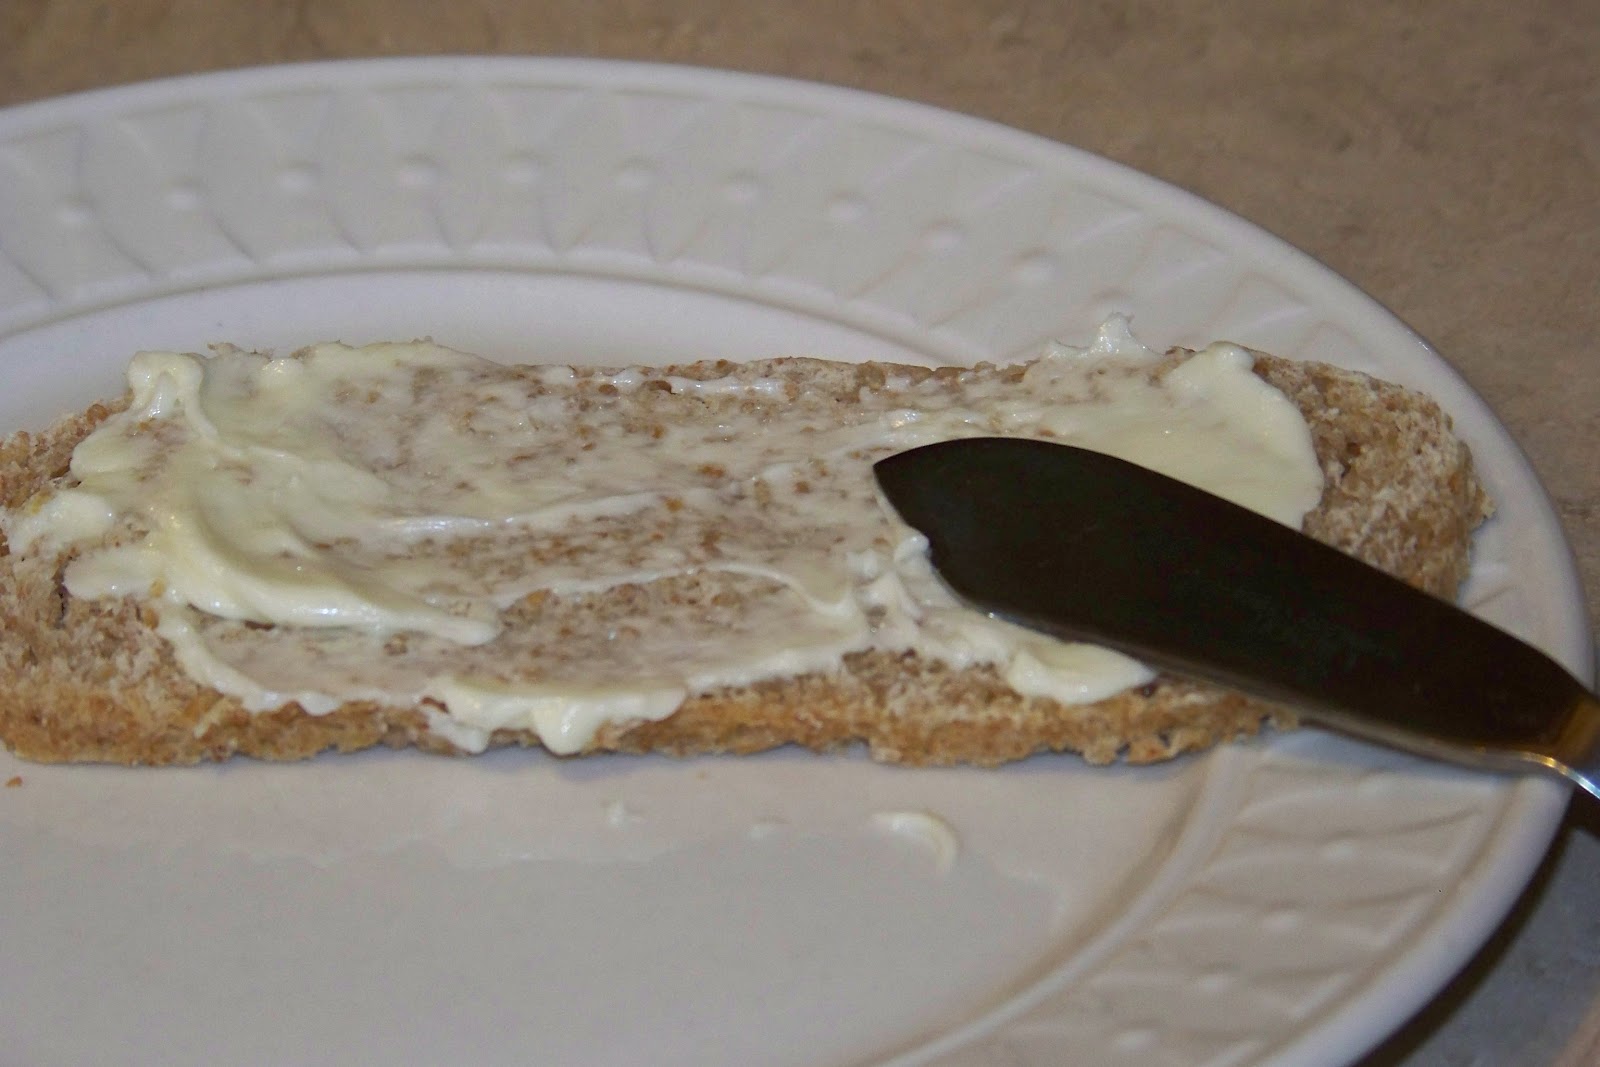
When dough is high and spongy, punch down-Get that aggression out!  Divide into 2 parts, form into loafs and put on a greased cookie sheet.  Cover and let rise again.  Brush the top with melted butter and with a sharp knife slash 3 or 4 cuts in the top.  Here's the nice crust secret *put a bowl of ice in the bottom of your oven*.  Bake for 25-35 min at 400 degrees until top is just starting to turn brown.  Rub a cold butter stick on the top of your nice crust and then sprinkle with salt and enjoy!
Nice risen dough


Place your shaped loafs on greased cookie sheet


Don't forget the most important part-the ice!

Mmmmmm butter


The cut slashes will give the bread room to expand as it rises

Perfectly starting to be brown! And my favorite part-melted butter and sprinkled salt on top!

Mmmmmmm!!!!


Be creative and Enjoy!


Saturday, October 6, 2012

Breakfast Cookies

These are a HUGE hit in my house!  My 4 year old girl ate 6 the other morning for breakfast!  They are easy, yummy, of course healthy, and the ingredients are in your pantry!

Preheat oven to 350

Mix:
 1 1/2c oats
1 c unsweetened applesauce
2-3 very ripe bananas
Handful of Craisens
Cinnamon to taste (I do at least 1t)


Spoon out onto greased cookie sheet and bake for 35 minutes at 350 degrees.


Perfect breakfast with a little glass of milk!


Be Creative and Enjoy!

Wednesday, October 3, 2012

Black Bean Corn Salsa

My aunt makes this and I LOVE it!  -Like sort of obsessed frequently eat mass quantities by myself love it!  In the words of my 4 year old "This is Delishness!"  This is an easy, pretty, salsa that's is great to take as a dish to a party or as a side to your homemade Enchiladas!


Black Bean Corn Salsa

1c frozen corn, thawed
3 green onions, chopped
1 avocado, chopped
1 can black beans, drained and rinsed


1/2 cucumber skinned and chopped (adds a good crunch)
Cilantro to your liking
Chopped Jalapeno to your liking
Salt and Pepper to your liking


Dressing:
1T olive oil
2T red wine vinegar
1/2t crushed garlic (maybe from your freezer?)

Make 30 minutes before serving so all the flavors can soak together! 

Be Creative and Enjoy!


Don't you worry I ate this ENTIRE bowl BY MYSELF!!!!  Yeah  that's right!