Pages

My philosophy....homemade is ALWAYS healthier, is ALWAYS cheaper, and is therefore BETTER!

When you make things homemade you will naturally never put in as much sugar or salt as the companies do-you just won't. Plus homemade means no preservatives and you know the common rule-your food should be able to go bad or its not real food!

When you make things homemade you're always saving money! Who wants to pay the manufacturer, shipper, store, etc. each for a box of cookies!?!?!

Once you go homemade-you'll never go back! Fresh food that YOU produced for your family will not only leave you feeling accomplished and proud, it tastes incredible and you'll never be able to eat the packaged stuff without comparing-and homemade will win!

Have fun, experiment, and Enjoy!

Friday, November 16, 2012

Piles and Piles of Laundry Oh My!

One of my least favorite jobs as a mom is definitely Laundry and with 4 kids- 5 and under I have a lot of it!  Consequently, laundry detergent is a significant cost.  But- significant cost no more! I found a recipe I followed here and it worked great!  Be sure to check out the STATS below!  You won't believe the cost difference!


You can find all the ingredients in your local gocery store in the laundry detergent isle -usually all right next to each other!  You need: Borax, Super Washing Soda, and Fels-Naptha (about $8 total!)  I also got a 5 gallon bucket to make it easier to mix (they're only like $2) 

You only use 1/3 bar of the Fels-Naptha soap per batch and each batch is 2 gallons. 


1.  Shred 1/3 of the Fels-Naptha bar and set aside
2.  Bring 1/2 gallon of water in a pot on the stove

3.  Add your 1/3 shredded Fels-Napth and bring back to a boil on Med-hi heat  (the first time I brought it back to a boil on high and when I added my other ingredients they totally boiled over and lets just say I have a very clean stove top :)


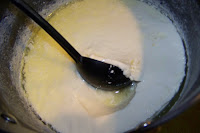
4.  Once it's completely melted add 1/2 c Borax and 1/2 c Washing Soda
        -Let this boil on med-hi for 5 minutes and stir


5.  Add 1 1/2 gallons of COLD water to your bucket and pour your soap into it and start to stir-I used an immersible blender but you can use your muscles if you don't have one.


6.  Let it sit for 30 minutes and stir again really well.


7.  Once you're done stirring, pour it into your container!  You're done!  


This recipe works for High Efficiency (He) washers also!  1/2 c per load-and be sure to shake your container before you pour it as it may settle if it sits there for a while.  I put it in an old detergent container I saved so I can have the dispenser, but the plastic jugs would work great too!  You can make powder detergent mix if you ALWAYS wash your cloths in hot water.  You may think its a "mommy fail" but I NEVER wash them in hot water because that would require sorting....which I don't do.  Don't judge.   If you use the powder in cold water it won't melt the Fels-Naptha soap. 

You can add scents if you want but to be honest the Fels-Naptha smells amazing! 

This is a great gift idea!!

Be Creative and Enjoy!

STATS:
Better-My clothes are soft, clean, and smell great!  There's no residue or waxiness like some other cheap detergents leave *check*
Healthier-Surprise Surprise there's all sorts of nastiness in laundry soap! this site said: Most companies add optical brighteners to detergent formulas—additives that emit blue light, making whites appear whiter by tricking the eye. By design, optical brighteners stay in clothes after washing, which may cause skin irritation. Wow!  *check*
Cheaper- Get ready for this!  1 batch will do 64 loads of laundry! 
The ingredients break down: Fels-Naptha = $0.32 a batch
                                                 Washing Soda =$.029 a batch
                                                  Borax =$0.17 a batch
So for 64 loads of laundry detergent it costs $0.78!  That's $0.012 a load!  1 PENNY PER LOAD!!!!!  This may be a homemade record! *check*

Can never have enough Butta!

Who doesn't love butter!?!  Guess what?!?  Its incredibly easy and the fresh taste is oh so good!  

With Thanksgiving coming up making butter is a fun and easy project for you and your kids to do to show how the people during the first thanksgiving may have enjoyed such a treat. 

What you'll need:
heavy whipping cream -at least 1/2 cup
pinch of salt (optional)
mason jar
little marbles or rocks


Put everything in your jar.  Put the lid on and start shaking!!  Turn on music, give your kids a jar, and let them work out their energy-while creating some extra tasty goodness for you!  After about 10 minutes your liquid cream will all the sudden become a solid and you'll hear it "thud" in the jar!  And, bonus...the extra liquid is buttermilk!  Who knew!  Drain the buttermilk and save for Buttermilk Biscuits??  Store in you jar, in a tupperware container, or make your own sticks by measuring 1/2 into folded parchment paper and put in the fridge to cool. 

Too Easy!

Info: Unsalted butter has a shelf-life in the refrigerator of up to 3 months
          Salted butter can last up to 5 months in the refrigerator because the salt acts as a preservative


Be Creative and Enjoy!


STATS-
Better: This butter is creamy, delicious, and actually tastes like cream-  Not plastic! *check*
Healthier: I'm sure you've all heard the stats about butter vs margarine. My biggest issue-Margarine is just not natural!  Its made by adding hydrogen to vegetable oil.  Mmmmm.....gross!  *check*
Cheaper: A quart of heavy whipping cream at Walmart is $2.98.  1 quart of whipping cream will make about 4 cups/2 lbs of butter (plus buttermilk).  2lbs of Kirkland brand butter at Costco is $5.25!  *check*

Sunday, November 11, 2012

Homemade Yogurt


So there I was a few months ago just enjoying a wonderful girl time conversation with my friends where I complain about the combination of how expensive things are and the horse-like appetite of my 2 year old.  This particular day I had just spent some sort of ridiculous amount of time finding, cutting, and matching coupons to purchase the little individual junk filled yogurt cups for $.56 a cup instead of $.66 a cup.  wahoo-big saver.   When I heard magical words spoken to me, "you know you can make your own yogurt?"  What?!?!  It had NEVER occurred to me!  Like ever!  So I've spent the last few months trying and trying again until I was sure my method (with MUCH advice and collaboration from my dear wonderful friend Lauren) is one that you can do and always end up with yogurt in the end.

With no further adieu I give you:  YOGURT!

 What do you need?  Milk and starter yogurt (store bought plain yogurt with live active cultures)

 You start with milk.  I use 2 percent because thats what my kids drink and I've tried whole but didn't see any difference in the yogurt so use what you have.

Pour 1/2 gallon milk into a large pot and heat on the lower end of med-hi
 --------I do these next steps while i'm making my kids food or cleaning my kitchen because you want to stick around to check on your yogurt as it processes.

You need to heat the milk slowly until its almost boiling but NOT boiling.  You do not want to burn the milk!   You're waiting until a skin develops on top and then you've hit the right temperature

Take the pot off the heat to let cool.  You need to let it cool until you can hold your finger in it and count to 10 without screaming.  Seriously -that's how I measure :) -this takes around 30 min or so

At this point you need to stir in your starter yogurt.  I use at least 1/2 cup yogurt for ever 1/2 gallon of milk.  Be sure your yogurt is plain and has live active cultures.  The milk has to be warm enough to let the cultures grow but not too hot that it'll kill them.  You need to start with store bought yogurt but then each time you make it you can save some of your previous batch as your next starter.

Turn your oven on and let it heat for 2 min and then turn it off

Put a lid on your pot and wrap it up on a couple towel with love


Put in your oven and leave it for at least 7 hours.  The longer you let it sit the more sour so if you like sour yogurt let it go-even 24 hours!


When your time is up take your pot out and behold....Yogurt!  The clearish greenish liquid on top is the whey.

You can stir the whey back in for regular yogurt that is a runnier yogurt.  You can also strain the whey out to make Greek Yogurt.  Greek yogurt is a thicker yogurt that is growing in popularity because of its health factors.  Whey holds the lactose and so Greek yogurt (without the whey) has far less carbs then regular yogurt and more protein per serving than regular yogurt.  For more info you can go here.

To strain out the whey, spoon the yogurt into cheesecloth and let it drain. 

Add jam, vanilla, or honey to sweeten.

Store in mason jars or Tupperware in your fridge.

Be creative and enjoy!


Delicious with Strawberry-Banana Granola


STATS:
Better: This stuff is so good! Its the real deal!  *check*
Healthier: Did you know that Yoplait's Go-Gurt has MORE sugar than Coca-Cola!?!?!?! Homemade yogurt allows you to control the sugar and make it tasty but keep it healthy!  *check*
Cheaper:  Yes I know $.56 per container is a total STEAL but....1/2 gallon milk will make 2 pints greek yogurt which is around $5 depending on the brand and you just made it for about $1.75! *check*


Strawberry-Banana Granola


As I walk down the isles of the grocery store I am again brought to my knees by shock and horror when I notice the seemingly miles and miles of colorful cardboard boxes full of sugar covered press-board; that is supposed to fill the belly of our young ones and provide them with enough nourishment and energy to sustain them through their arduous morning.  Not going to happen!  But alas!  There is a tiny bag...way up high...full of something that looks healthy....full of fiber and oats....and it's delicious!  It is...Granola!  Yum.  One problem-that tiny bag is $6!  There's not enough in that thing to last my 2, 4, and 5 year old for 1 meal!  And so I give you... this: 

Strawberry-Banana Granola (to be said in a loud deep manly voice that echos)

There are many many many granola recipes you can find online and I love lots of them.  This one is just my families new favorite!  I found it here

Strawberry-Banana Granola
1 or 2 bananas
1 cup strawberries
1/3 cup brown sugar
1/3 cup honey
¼ cup canola oil
¼ cup water
½ teaspoon cinnamon (optional)
several gratings of nutmeg (optional)
10 cups rolled oats
½ cup wheat bran
½  cup flax seed
1 cup walnuts, roughly chopped (I chop my walnuts up pretty small so my little ones don't notice them)
1 cup almonds, sliced, slivered, or roughly chopped
1-1/2 cup dried cherries or cranberries

Combine the bananas, strawberries, sugar, honey, oil, water, cinnamon and nutmeg in a blender and blend till thoroughly pureed.


Combine the remaining ingredients except for the dried fruit and mix with your hands till the ingredients are evenly distributed. Pour the fruit sauce over the oat mixture and stir till it’s all evenly mixed.  Bake for 45-60 minutes at 300 F., stirring every 15 minutes or so.

When the mixture has cooled, add the dried fruit and store in an airtight container.   Yield: Plenty! Can be halved.

 I know....that sounds soooo good right?!  We eat it with homemade yogurt and fresh strawberries and bananas in parfait form or just with milk as cereal.  

Be creative and Enjoy! 


SOOO good with  Homemade Yogurt 

Stats:
Better?  Ok that expensive store bought stuff is good....but this is soooo good! *check*
Healthier?  Sorry folks, even the all natural stuff has preservatives...it's gotta last the test of the time shopper.  *check*

Cheaper?  Even if you were to buy everything on this list just for this recipe it'd probably cost you what-$10?  And it makes a good 10 cups!  The expensive stuff is at least $6 for less than 3 cups!  Seriously!  *check*